Teamup Ticker
See more event details in Scheduler view without opening an event
Wed 31 Jul 2024
.Ticker > Tips / Support Nuggets
Scheduler view is a very helpful layout in many scenarios. If you're planning shifts, booking resources, or finding availability then you may prefer using Scheduler view where you can see events displayed side-by-side.
If you want to see more details without needing to open up an individual event, you can set custom fields to show in the event titles.
- For choice fields, you can show either an assigned emoji or the option name in the event title.
- For text or number fields, the contents of the field can be shown in the event title.
You can also set some default event fields (Who, Where) to show in the title.
The field contents will be shown behind the title of each event:
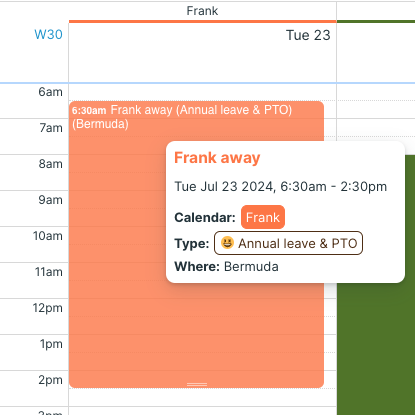
Note that you can also hover your mouse over any event to see a pop-up preview of event details, as shown above.
To show an event field in the title
- To show event field contents, go to Settings > Event Fields.
- Click the Edit icon for any field, then scroll to the Show in event title section and check Yes.
- For custom choice fields, you can assign an emoji to the options and choose to show the assigned emoji in the event title, rather than the name:

event details, title, fields, show, hide, customize, Scheduler view