
Teamup Ticker
Use case: Capturing and sharing job information with multiple teams
Scenario: A manufacturing and remodeling company offers upgraded and custom-built kitchen counters and cabinetry, primarily for residential customers.
The challenge
The staff in the office take orders and pass them to the production supervisors. Once production is completed, office staff handle scheduling with installers and contractors to get the finished products in place. Production timelines can vary, so office staff need regular updates so they can adjust the installations schedules and keep customers informed. They also have to coordinate with contractors who may need to be onsite for the install or have other tasks that have to be completed before an install can be done.
Scheduling factors and needs
- Show status updates on each job so office staff know when a piece is finished and ready for delivery, when it's onsite and ready to be installed, etc.
- Make all the information for a job accessible to everyone involved.
- Keep good documentation of work done on each installation.
- Assign the best installers for each job, and ensure there's enough time to complete an install.
- Coordinate with contractors to ensure that each piece of the job is done in the right order, materials are onsite, etc.
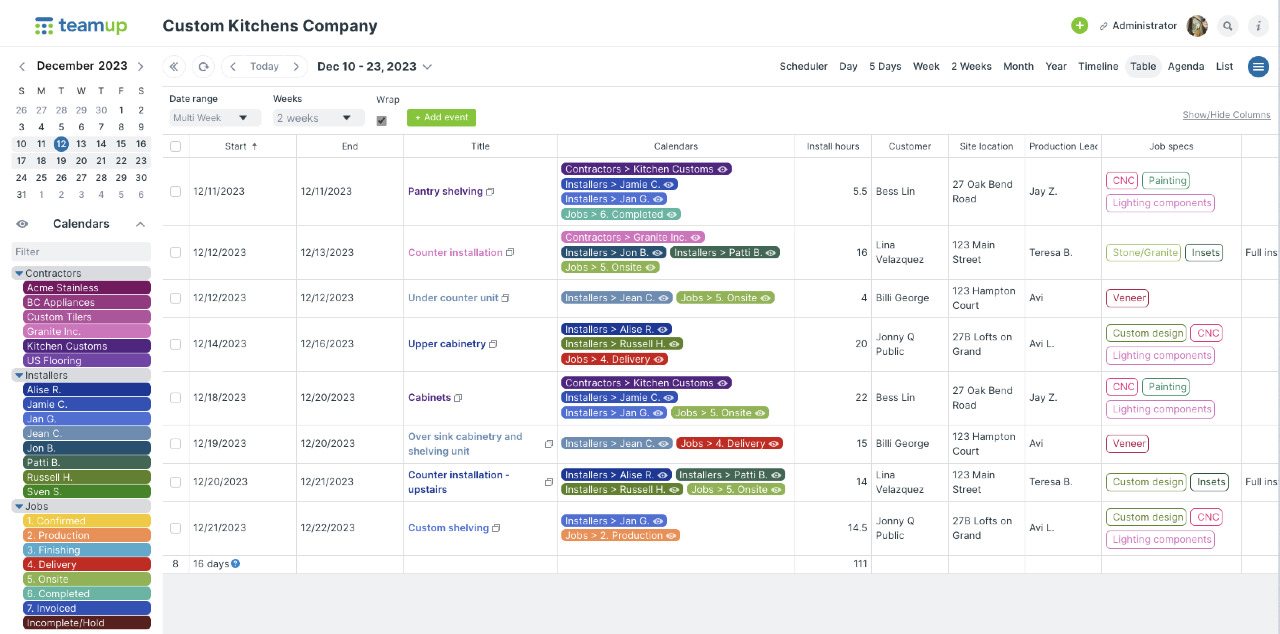
For this scenario, here's how you could set up a system with Teamup to handle the varying timelines and challenges, keep everyone updated, schedule efficiently, and make customers happy.
Calendar structure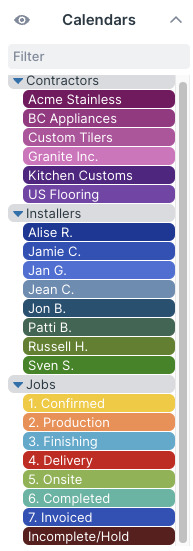
Sub-calendars
The sub-calendar list is long! But organizing the different sub-calendars in folders is helpful. You can collapse an entire folder when it's not relevant.
- Create a sub-calendar for each installer. Organize these in an Installers folder.
- Create a sub-calendar for each contracting company. Organize these in a folder.
- Create a sub-calendar for each job status. Number these so they stay in the order you want. Organize these sub-calendars in a folder.
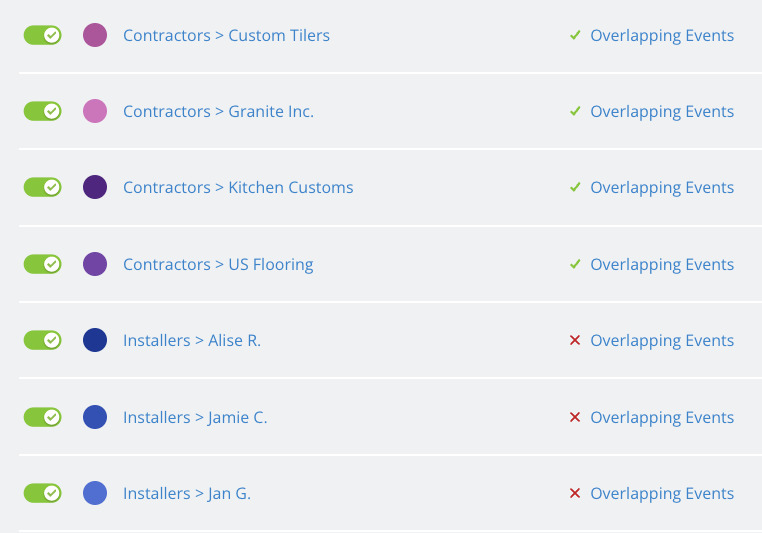
- Disallow overlapping events on the installer's sub-calendars. Allow overlapping events for the other sub-calendars.
Event fields
You can customize the built-in event fields and add custom event fields to capture all the information needed for each job.
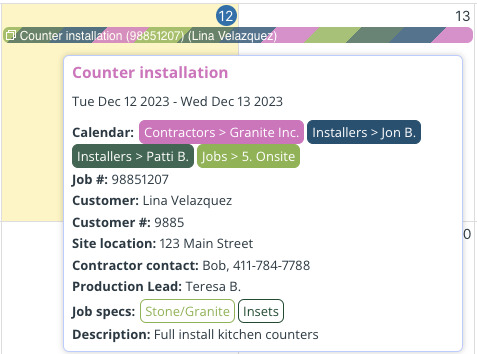
- Change the built-in fields for Who and Where to "Customer" and "Site location."
- Enable the Event Comments field and set it to be visible to All users by default.
- Add custom text fields for information you need to capture on each job, such as Customer #, contact information, and who's assigned to production, design, etc.
- Add a custom choice field with options for various job specifications.
If there's a field that must be filled out for every job, make it required.
You'll automatically have a filter for any custom choice field: Calendar access
You can set up calendar access via user accounts or with shareable calendar links.
- For office staff: Add each staff member as an account-based user. Set each staff member's access permissions up for how they'll use the calendar. For example, a Scheduler will need Modify access to all sub-calendars.
- For installers: Add each installers as an account-based user or create a shareable calendar link for each. Give each installer Read-only access to the sub-calendars they need to see for their scheduled jobs.
- For contractors: Create a shareable calendar link for each contractor with Read-only access to only that contractor's sub-calendar.
Calendar views
Adjust the default settings for calendar views to fit your normal scheduling timeframe, for example:
- Set Multi-week view to show 2 weeks if you often work with a couple of weeks at a time.
- Adjust Multi-day view in the same way.
- Hide weekends from view if you don't do any scheduling on Saturdays or Sundays.
- You can disable any calendar views that won't be used.
- Check and adjust default configurations for Table and Scheduler.
Scheduler shows each calendar in a column, and it's great for side-by-side availability comparison and fast scheduling.
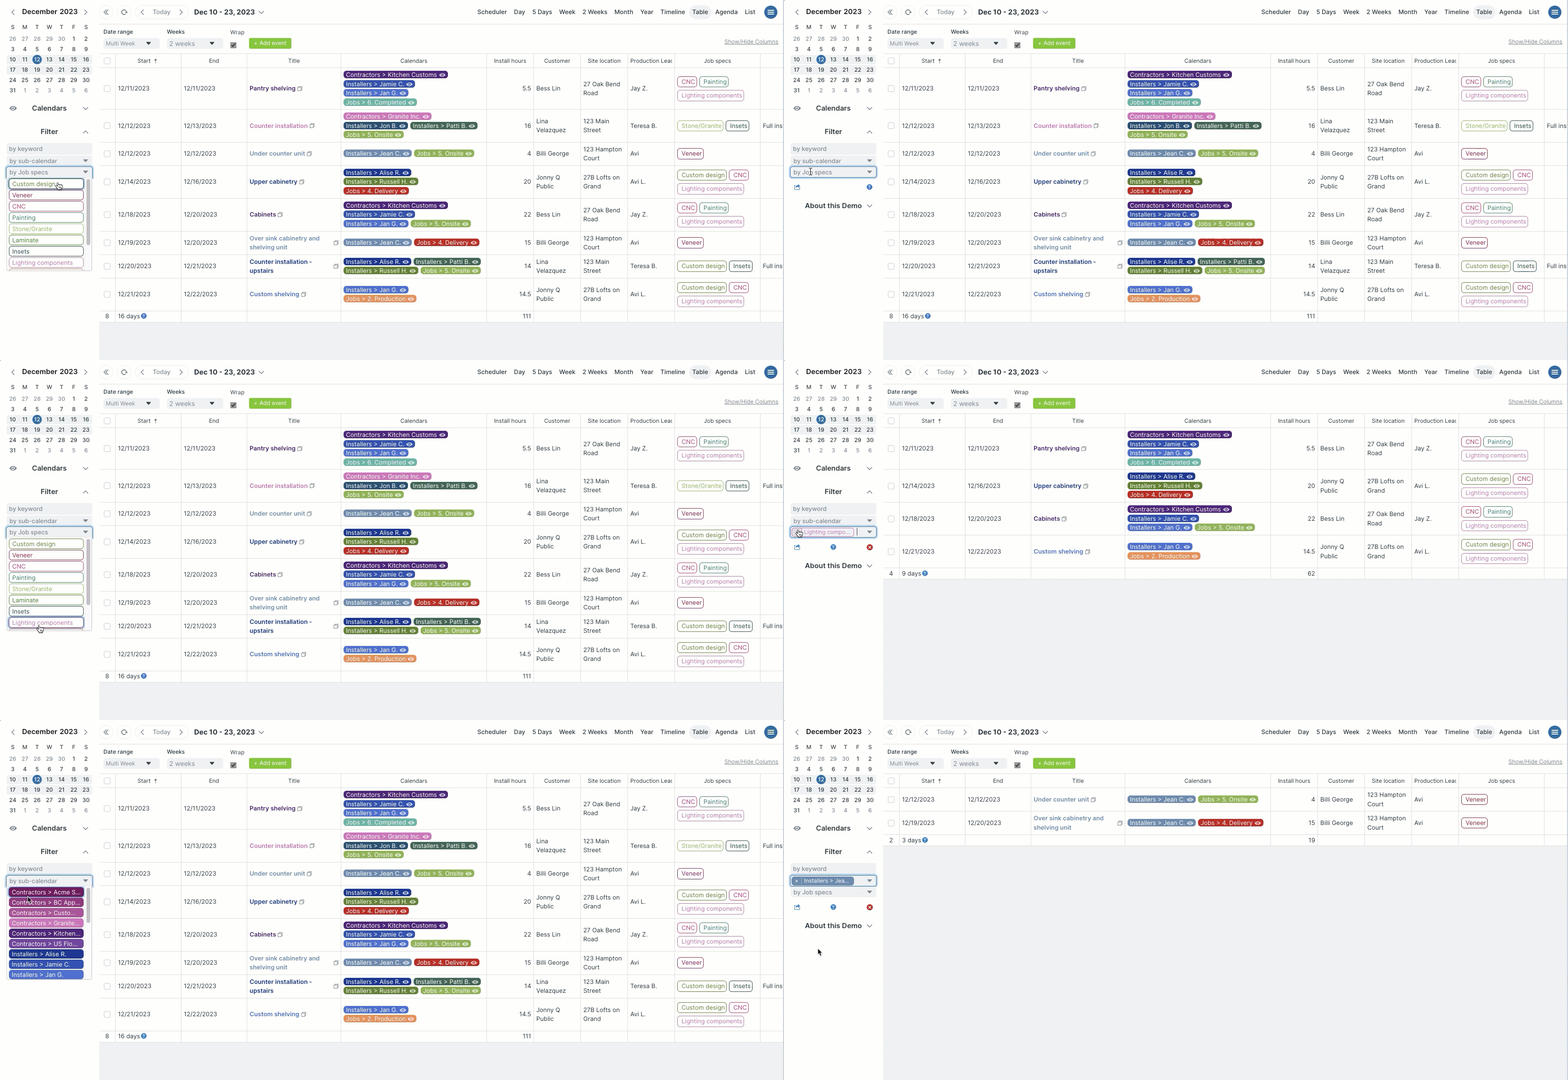
For sorting jobs by status, try out filtering with Table view:
Documentation and mobile apps
Event comments: Documentation is really important for this company. The installers use event comments to upload photos and make notes. They can take photos when they arrive to document how things look, and upload photos when the install is completed for proof of job done and a record of the condition things are in. This helps prevent conflicts and resolve issues that may come up with contractors or customers.
File uploads: The office staff upload forms, files, specs, reference images, and any other documents to the scheduled jobs. Detailed instructions and special requests go in the job's description field, along with inline images. Installers can access all the information at the site, using Teamup's mobile app (iOS, Android).