Teamup Ticker
How to create a new Teamup calendar
Thu 4 Jan 2024
.Ticker > Tips / Support Nuggets
So you're ready to get started with Teamup? Wonderful. Let's take a look at the steps to create your first Teamup calendar and set up your Teamup user account.
Create your Teamup calendar
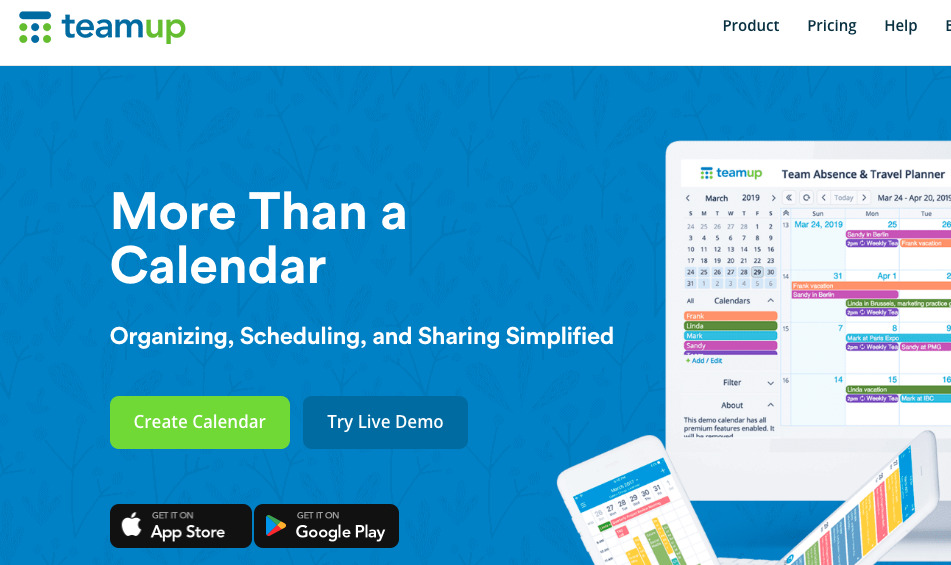
- Go to Teamup's homepage and click the green Create Calendar button:
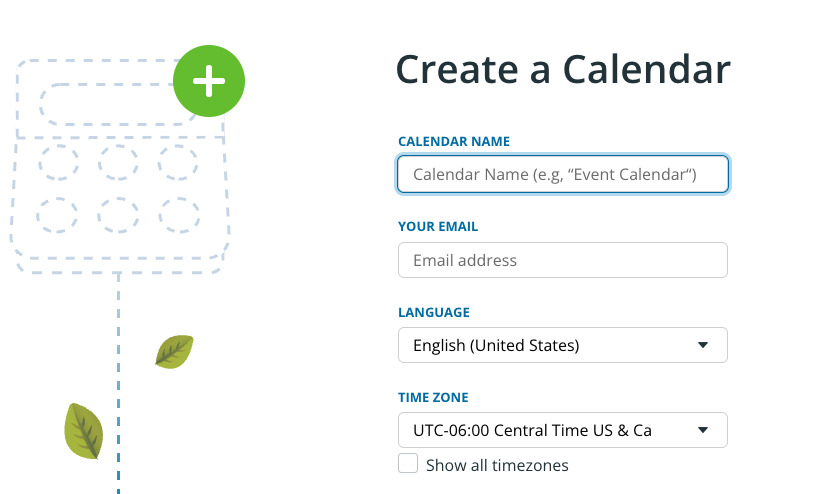
- Fill out the form to create a calendar: Choose a calendar name, enter your email, and set your language and time zone. Don't worry, you can always change this information later!
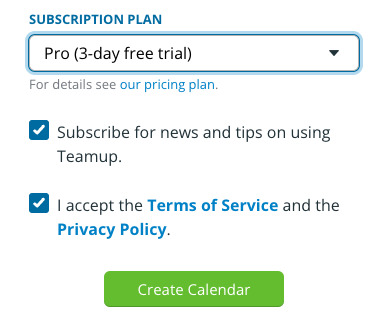
- Select a subscription plan for a free 3-day trial. After the trial, the plan will revert to the Basic (free) plan unless you enter payment information.
- Not sure which subscription plan to choose? See a comparison. If you're creating a calendar for business use, try Business for more sub-calendars and custom fields. For personal use, Pro is a good choice so you can explore all the features.
- You'll need to accept the Terms of Service and Privacy Policy before you can proceed. Click the blue links to review them.
- We also recommend subscribing for tips to make the most of your new Teamup calendar.
- Once you click the green Create Calendar button, you'll see a page like this:
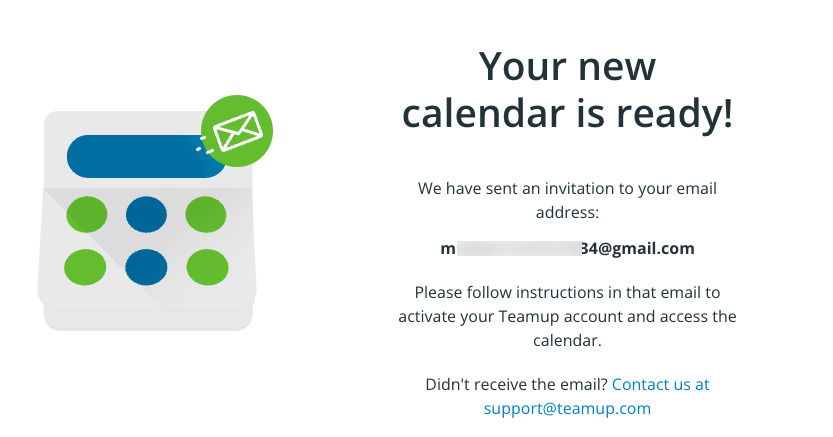
- Go to your email and find the invitation email from Teamup. Click the activation link:
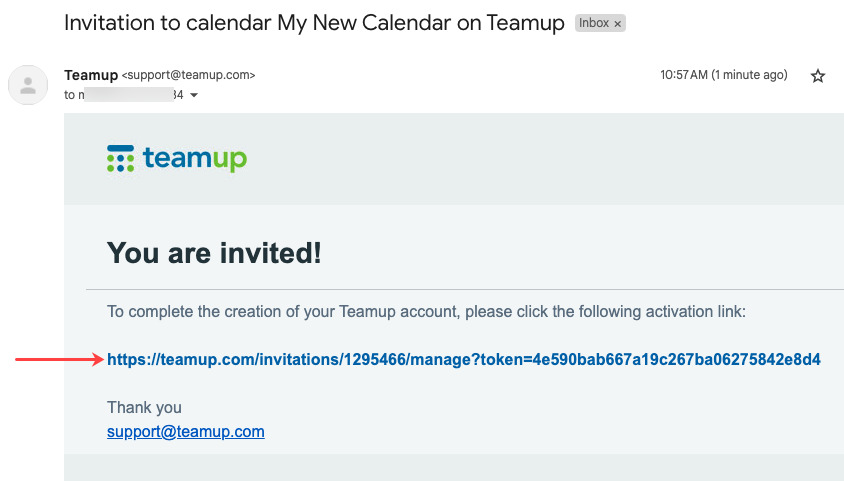
- The subject line will read "Invitation to calendar [Name of your calendar] on Teamup."
- If you don't see the email, check your Spam folder. You can also search for keywords from the subject line to locate the invitation email. Be sure to include all folders (Trash, Junk/Spam, etc. in your search).
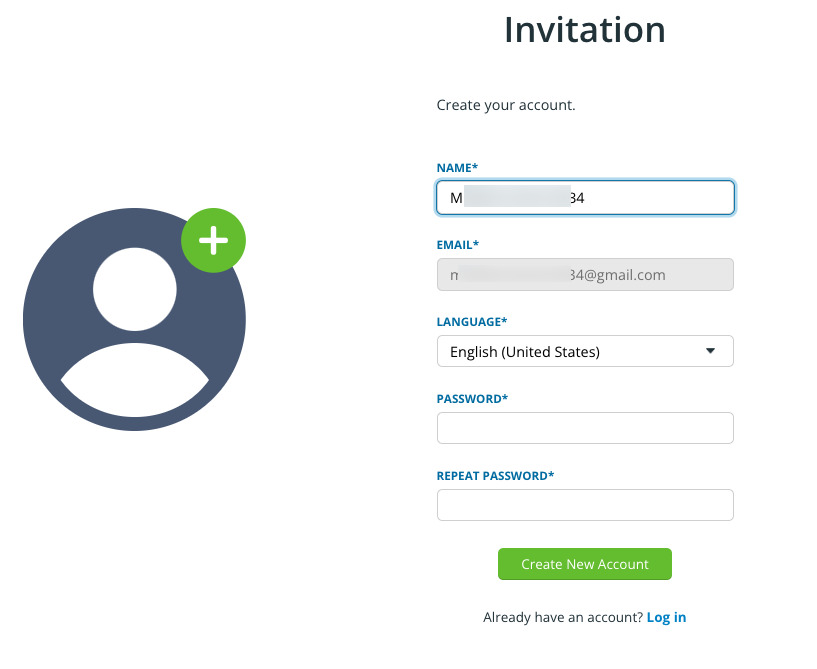
- When you click the activation link, you'll go to the account form. Choose your user name, language, and password. Then click the green Create New Account button.
- You've done it! Your new Teamup calendar and Teamup user account are ready to go. Click the blue link to Start using your calendar:

- Your new calendar will open.
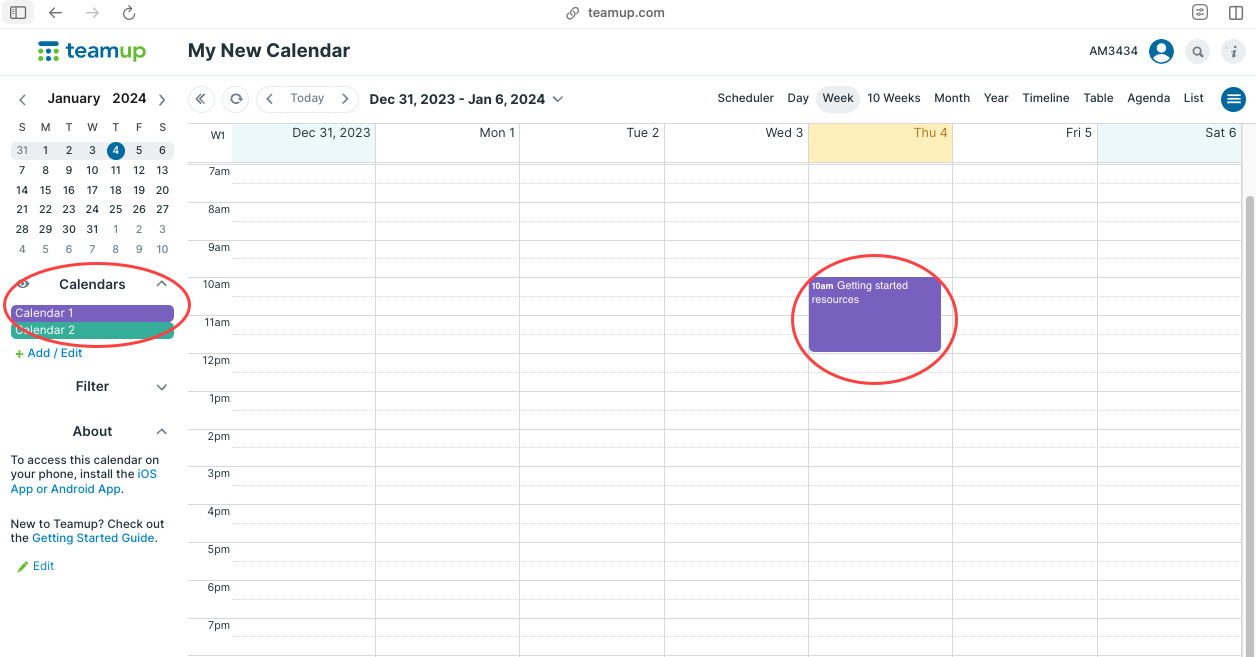
- On the left, notice the two pre-populated sub-calendars. Click the blue Add/Edit link below the calendar list to add your own sub-calendars and modify (or remove) the pre-populated sub-calendars.
- On the right, notice the pre-populated Getting Started resources event which contains helpful links. Click the event to open it and scroll down to the Description:

- You can delete the event when you no longer want it.
- There are two important menus in your new Teamup calendar:
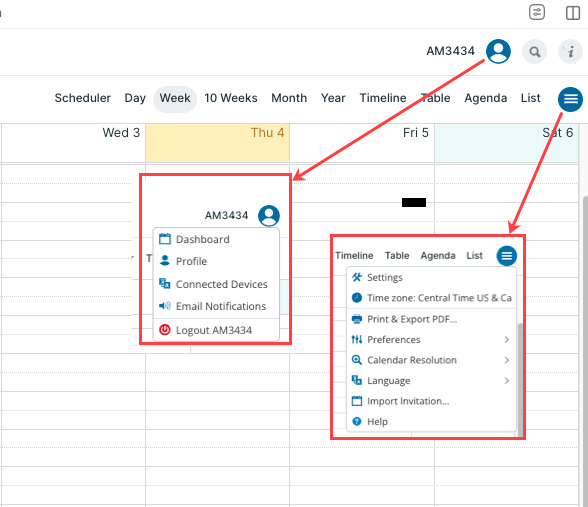
- The user account menu is where you'll access your user profile and calendar dashboard.
- The calendar menu is where you'll access full calendar settings, preferences, etc.
- Start exploring! The best way to learn how Teamup can work best for you is to start exploring.
- Try out calendar views, take a look at settings, create an event, and so on.
- Use the links in the Getting Started resources event to learn more about any feature or function.
- Visit our Knowledge Base for more help and check out our video tutorials, too.
- If you get stuck, contact our support team. We're here to help!
getting started, basics, new, onboarding, guide, Teamup 101, create calendar