
Teamup Ticker
Mini Guide: Set up a calendar for short-term or transitory projects
Perhaps you want a Teamup calendar for operational needs like these:
- managing multiple projects with overlapping schedules.
- planning project phases and allocating resources to avoid conflict.
- overseeing smaller jobs and task assignments that drive the schedule.
- collaborating with multiple team members who are assigned to jobs.
- keeping project phases on track and updated as work is done.
Here are a few steps to quickly set up your Teamup calendar:
Sub-calendars
- Add a sub-calendar for projects. You might use just one for all projects. Or, if you'd prefer using multiple sub-calendars, organize them in a Project folder. You could consider each sub-calendar as one category of projects. It's usually not necessary to set up a dedicated sub-calendar for each project, especially if the projects last for only a few days or weeks.
- Add one sub-calendar for tasks. Or create a Task folder with multiple sub-calendars for the different categories of tasks.
- Add a Team folder which has one sub-calendar for each team member.
Custom fields
- Create a custom text field for Project ID or another unique code used to identify a project.
- Optionally, create a custom choice field for project and/or task status.
Calendar views
With Teamup, you can display calendar data in many different layouts and gain insights that are otherwise invisible:
- Zoom out with a relative long-term view to get an overview of all projects, their timeline, tasks, and status. Try multi-week view (which shows up to 12 weeks), month view, timeline view, or table view. For projects that span a longer time, the year view shows the big picture.
- Zoom in with the day or week view. On a daily or weekly basis, you're checking details, noting tasks to be done, seeing jobs in progress and any delays or issues. Try the table view, timeline view or the upcoming new scheduler view, as well; you can define the best date range best for what you want to focus on.
- Set your default calendar view in Settings > Calendar Views. If you often need to see the data in a different view, you can bookmark your calendar URL with a view parameter. Then it's easy to shift between different calendar views.
An example project calendar:
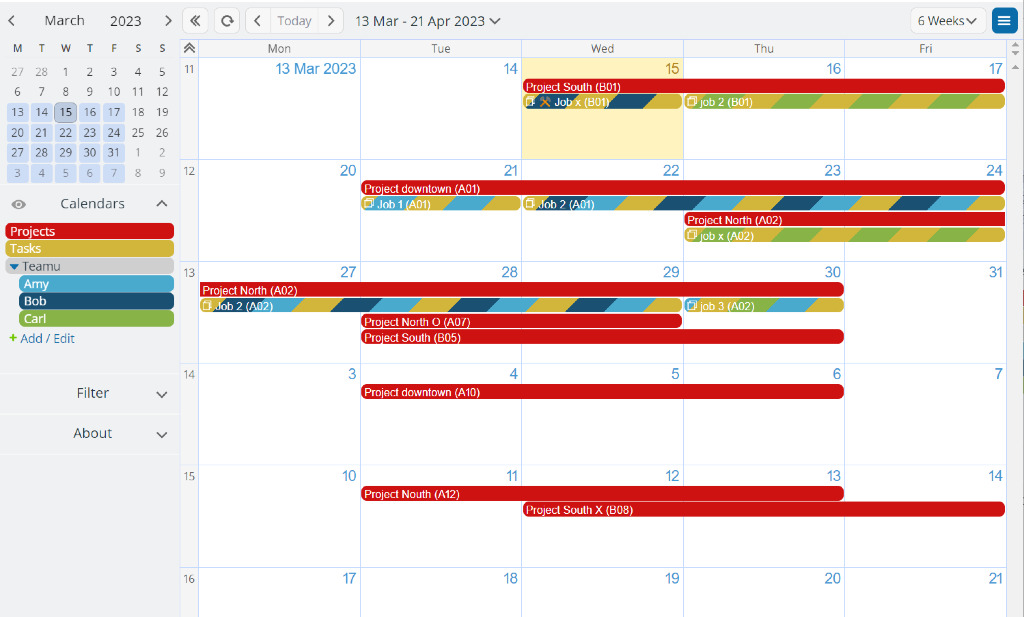
See less data for more insights
Focus with filters to hone in on certain aspects of any project.
- Toggle on the left to see only the project calendar:
In multi-week view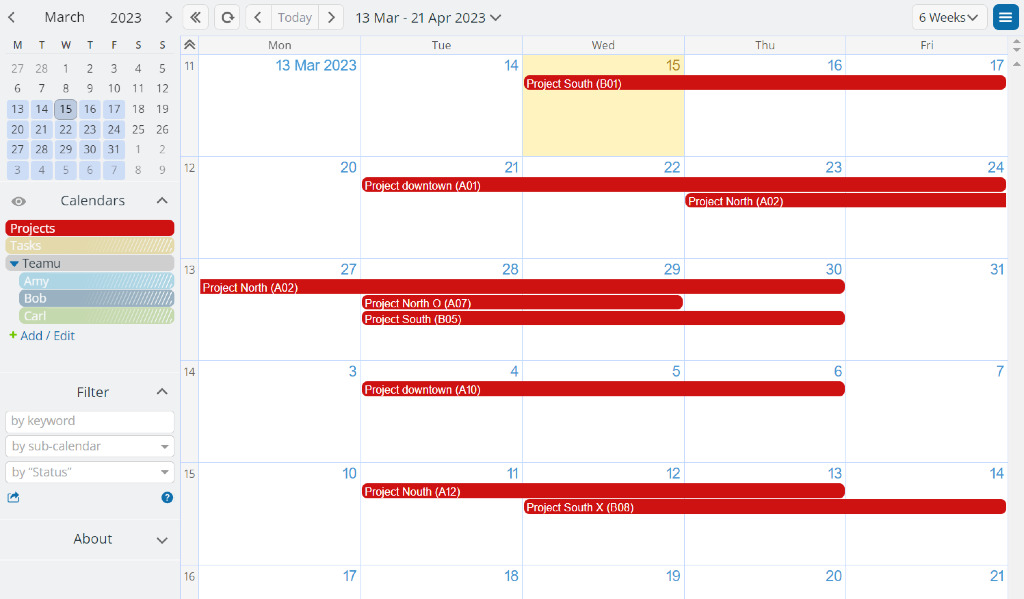
or in timeline view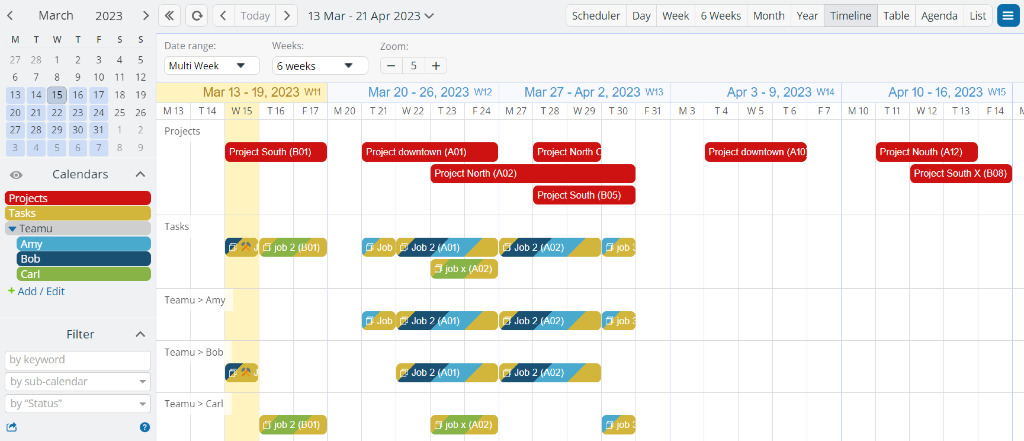
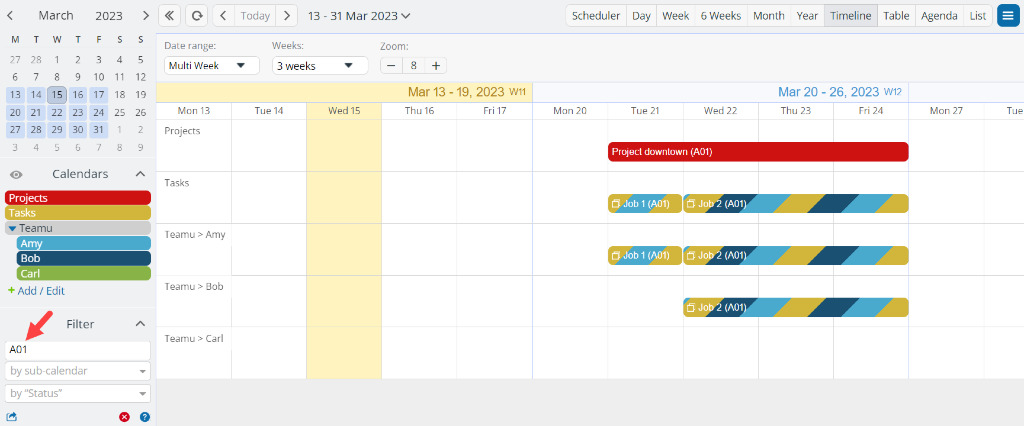
- Filter by project ID in the filter on the left to see project A01:
In multi-week view: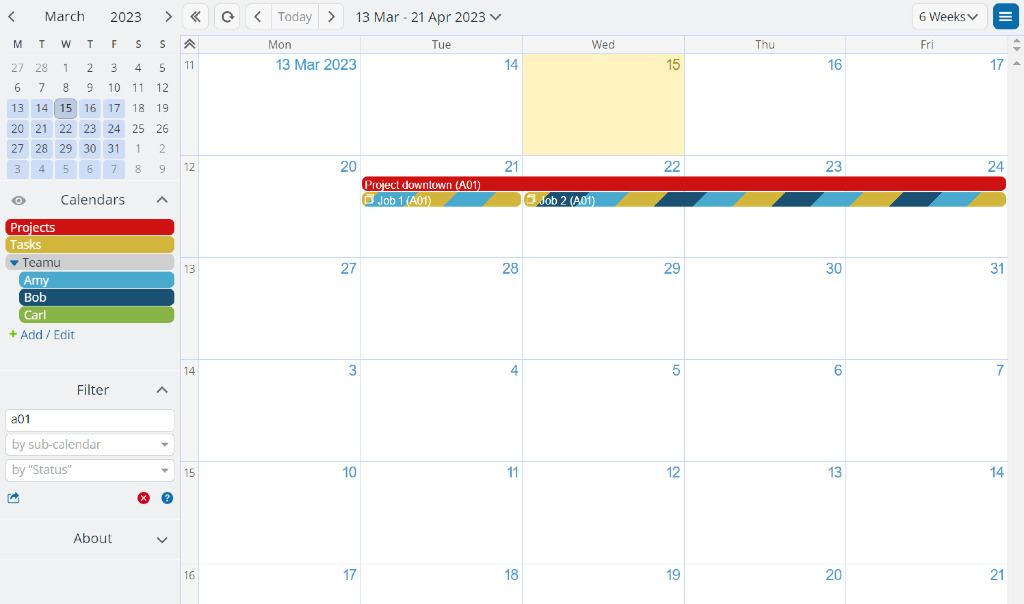
In timeline view: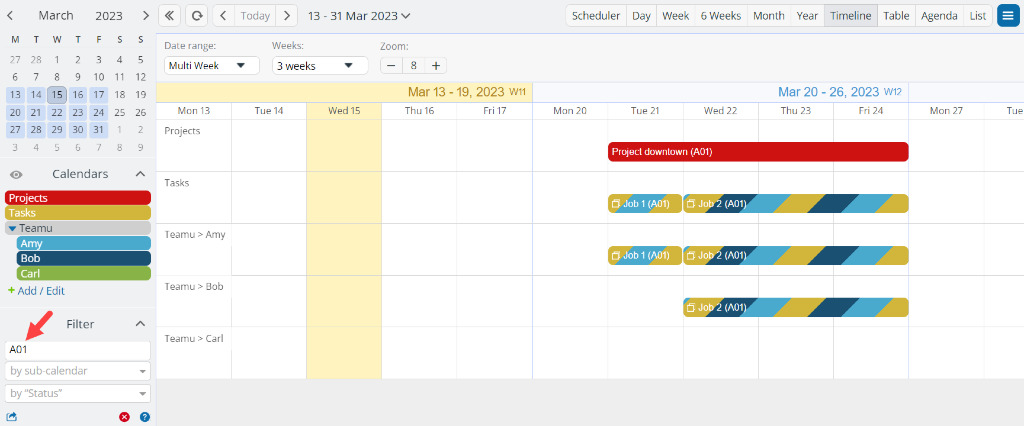
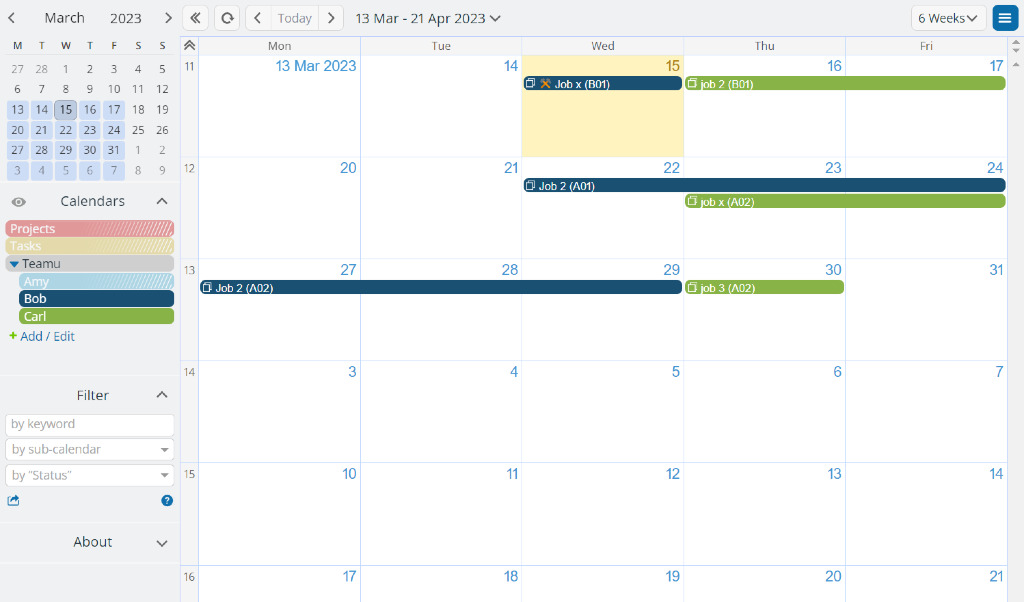
- Toggle the team calendar to see assignments for Bob and Carl:
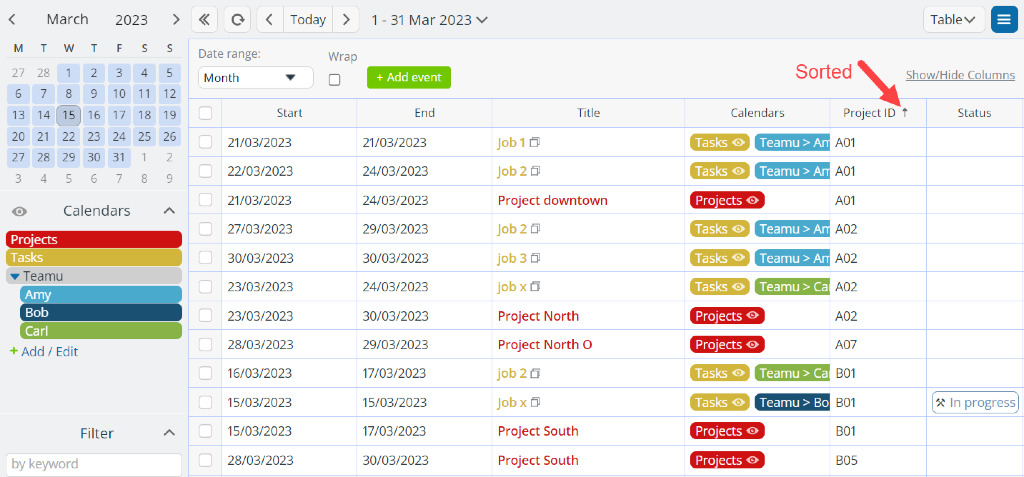
- Sort by event field in the Table view:
Share access with the team
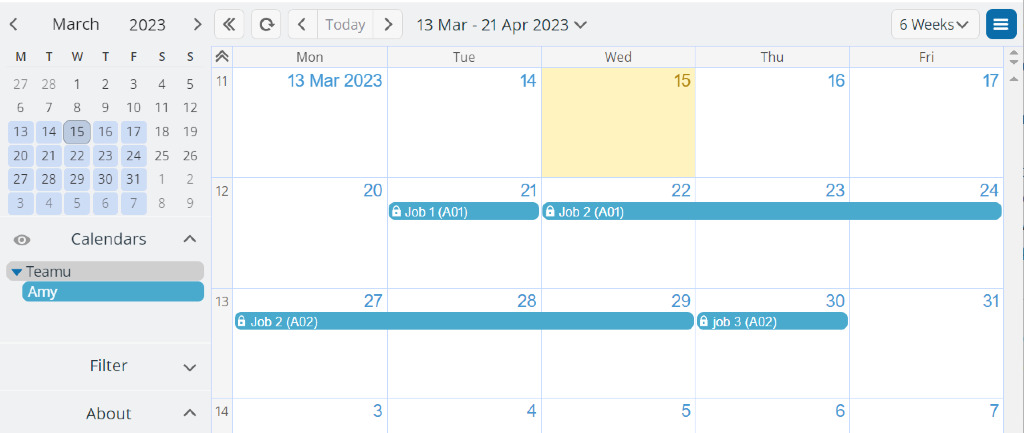
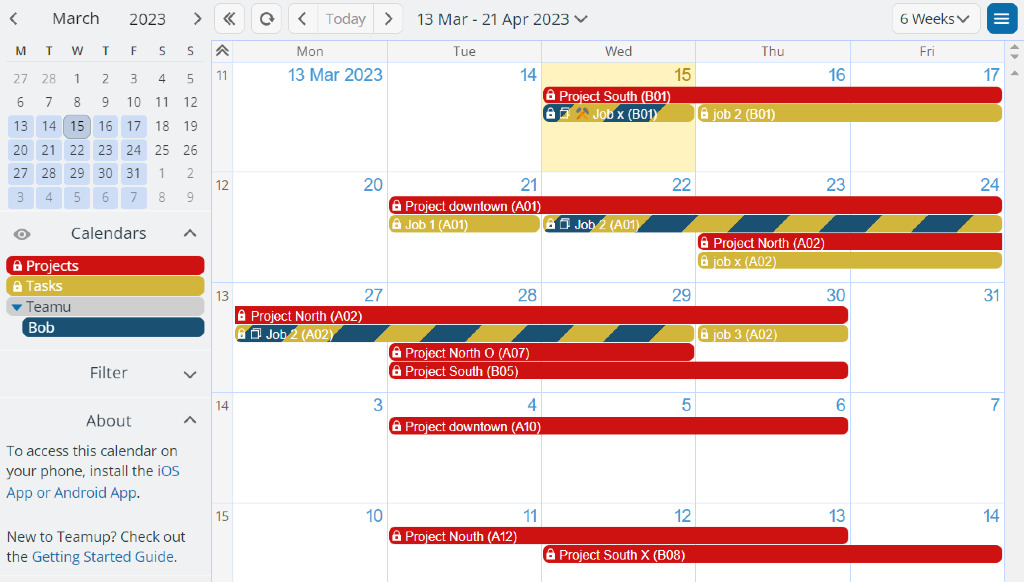
It's highly recommended to customize access for the team members for their role. For example, you can allow a team member to see only their own assignments without seeing other teammates' jobs. You can allow a supervisor or team lead to see all team member's jobs. Here are three examples of giving customized access.
- Amy can only see her own jobs:
- Bob can see all projects and jobs and can add/update events to his own calendar (e.g. he can add his vacation plans to the calendar so he won't be assigned for jobs):
- Carl can see all calendars including Amy's and Bob's calendars, with job details:
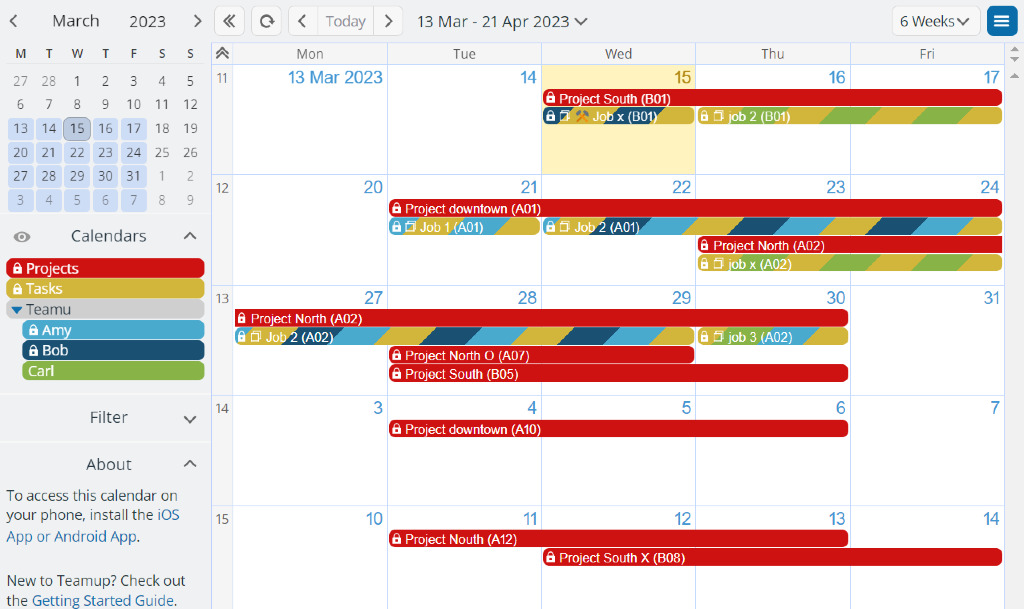
Think about what each team member needs in order to do their job, then customize their calendar access so they have the relevant information available, without the clutter.
Tips for working with events
- Assign one event to multiple sub-calendars
- Using fewer keystrokes when entering data
- Quickly move events in the year view
- Shortcuts to copy events
Tips for filtering events on display
Tips to optimize
- Enable the Comments field by default in Settings > Event Fields > Comments.
- Attach files to the jobs to avoid information bottleneck and keep team members updated even in the field.